Home-made Tofu

So now that you’ve mastered the art of making home made soy milk, you can use this skill (preferably even at the same time as making the milk, because it’s all already set up!) to make home made tofu.

It’s pretty easy and requires only 2 ingredients as well – surprise surprise. Whilst I’ve only ever made it once, I surmise that it is easy enough to repeat and even perfect, but in the meantime this has been a fun and rewarding creation that has satisfied my tofu craving (seeing as I live in a small rural town on the east coast of South Africa, and can’t access any shops within a 100km Radius that sells tofu – especially during lockdown).

Ingredients:

• 1.5 L Fresh home made soymilk (see previous post for method)

• 2 tablespoons fresh lemon juice mixed with 1/2 cup water

Equipment:

• wooden spoon

• cheese cloth – lay this inside the container with holes on the bottom

• 1x container with holes on the base (I used the top half of my steamer) // a tofu press

• 1x heavy object that fits in side the above mentioned container

Method:

1. Turn the fresh hot soy milk off the heat and let cool for 2 mins until no longer boiling / bubbling. Once cooled, stir in half of the lemon juice – water mixture for a minute, before stirring in the other half.

2. After about 30 seconds – 1 minute you should see there milk separating into curds and whey. So stirring the milk and let it sit for 10 minutes or so.

3. After 10 minutes, the tofu curds should have completely separated, leaving you with a watery liquid on top and curds on there bottom (see pic below)

4. With a slotted spoon / fine sieve, scoop of the curds and place them into the cheese cloth, making sure there is a container below for the water whey to drip in to.

5. Once all the cords are scooped out, fold the cheese cloth over the top of the curds and place a heavy object on top, and either passively or actively let the heavy object squeeze as much liquid out of the tofu as possible.

6. Once all the liquid is squeezed out, remove tofu from the cheese cloth and store in an airtight container. The more water you squeeze out, the former it will become!

7. Enjoy!

My favorite ways to use tofu:

– Tofu Scramble on toast

– Stir fried with soy sauce and mixed in with veggies or topping pasta and sauce

– Blended in to creamy sauce to thicken and add extra protein

– Crumbled into lasagne sauces

Home made Soymilk recipe

Hello lovely people. I come before you today to bear witness to the fact that you can quite easily make delicious, sweet and fresh soymilk at home from the comfort of your own kitchen with only 2 ingredients ! It is way better than store bought kinds as it is preservative free and much cheaper!

This whole process yields lots of soymilk that lasts at least 1 week in the fridge ( mine was used up at the 7 day mark) and if you want, you can even make tofu from it too, which I will be posting in another blog post very soon.

Before we get into the recipe, I want to address a common misconception about soy and soy related products (milk, tofu, tempeh and other faux soy meats) – namely that it is a widespread (false) belief that it acts like an oestrogen and promotes cancers and feminization. This is completely and utterly false and in fact is the opposite.

Soy beans contain a type of plant oestrogen, phytoestrogen, called an isoflavone. It acts to weakly bind oestrogen receptors in the body and can have either a pro or anti-oestrogen is effect on the body’s cells (1). Soy is also rich in protein, B vitamins, potassium, magnesium and fiber. Research shows that consuming soy regularly (daily) reduces the risk of breast cancer, colon cancer And prostate cancer. It also does not affect male fertility or female fertility, when consumed as an adult or child. It is also linked to reduced levels of inflammation, which is correlated with downstream effects on the health of the guy, heart and immune system (2).

So, in other words it is recommended that soy and it’s products are consumed regularly for it is, not only healthy but has a much more beneficial effect on your body than consuming dairy milk (which is very high in oestrogen, considering it is in fact meant to be consumed by baby cows to grow into large cows and not adult humans). In addition it is one of the more environmentally friendly milks to be consuming – as shown on the graph below (3).

Ingredients:

1. Dry Soy beans (I used organic) – the amount depends on how much milk you want to make but I used about 1kg dry beans which yielded about 5 liters milk

2. Water

Equipment:

• blender (I use a nutribullet)

• cheesecloth or fine mesh sieve

• large pot/s

• time and patience 🙂

Method

Start by soaking your dry soybeans in water overnight.

Once soaked, rub the beans in between your fingers to remove their skins and then scoop the skins the top of the water and discard skins in compost (they should float, especially if you pour more water into the beans)

Once most of the skins are removed, drain the beans and then begin blending approximately 1 cup soaked beans with 2.5- 3 cups of water until a smooth consistency

Once blended, pour the raw milk through a cheese cloth or sieve to separate out the pulp. Squeeze out any excess milk from the beans to get out as much as you can.

Put the milk then in a pot and begin to bring to a boil on the stove. Once boiling, turn down to a simmer and let cook for about 25 – 30 minutes

You should keep stirring often to prevent the milk burning at the bottom and also to remove and scoop of any foam or scum that develops on top. There should be a skin that forms on top of the milk after about 15 minutes. Scoop off the top and keep simmering. The milk should be a homogenous color and texture, of a tan / white color. It becomes sweeter and less beany in taste the longer it is cooked. Once at the desired taste for you (approx 30 min) turn off the heat and bottle. Enjoy! Store in the fridge.

References

1. https://www.hsph.harvard.edu/nutritionsource/soy/

2. https://www.hsph.harvard.edu/nutritionsource/soy/

3. https://www.bbc.com/news/amp/science-environment-46654042

Chewy chocolate nut cookies

Hello fellow earthlings, I hope you are keeping well in this crazy semi apocalyptic time we are currently facing with the Coronavirus pandemic. In an attempt to cheer you (and your sweet satiation) up, I will be sharing this oh-so-good cookie recipe which is not only delicious but the right amount of chewy plus is pretty healthy, whole grain, gluten and oil free! I hope you enjoy it🌞

Ingredients:

• 90 grams of oats (45g blended to form a flour, 45g whole)

• 90 grams buckwheat flour

• 180g brown sugar (I mixed brown & coconut sugar)

• 125g smooth unsweetened peanut butter

• 125g tahini

• 1 tsp baking powder

• 1 tsp vanilla essence / extract

• 2 tablespoons ground flax seed mixed with 6 tablespoons water

• 50g dark chocolate, chopped / blended finely

Method:

1. Star by mixing the ground flaxseed and water and let sit for 5 minutes as it coagulates.

2. Mix the oats, oat flour, buckwheat flour, sugar, chocolate and baking powder together

3. To the same bowl, add the peanut butter, tahini, ground flax mixture and vanilla and then mix everything together (with a spoon or your hands) until it forms a consistent “dough”

4. Pinch of golf ball sized amounts of the dough and roll into balls before flattening into circles about 2cm thick and 5cm wide.

5. Place directly on to baking paper, on a baking tray and bake at 180 degrees for about 15 minutes until golden on top. Let cool before eating.

This should make about 18 cookies !

Tahini Bliss Bites

New favorite date ball spin off recipe: enter TAHINI !

For those of you who do not know what tahini is, it is essentially sesame seed paste (equivalent of peanut butter but made from sesame seeds). It’s one of the most versatile ingredients that is traditionally used in middle eastern dishes such as hummus, tahina, baba ganoush and halva.

It has numerous health benefits (asides from its total taste sensation) in that it is a rich source of copper, manganese and calcium in the diet. It is also the source of two unique types of fiber (sesamin and sesamolin) which have been shown to lower cholesterol levels in humans as well as prevent high blood pressure.

So basically it is a fantastic source of nutrients and energy and this recipe will make your body happier and energy filled !

Ingredients:

makes 15 balls

• 5 tablespoons tahini

• 9 large dates (remove pips – I use Zamali dates) or if using dried dates, about 18 (soak in boiling water until soft)

• 150 g oats, pulsed into flour consistency in a blender

• 50g desiccated coconut

• 1 tablespoon chia seeds

• extra sesame seeds for rolling / covering the tops

Method:

  1. Start by blending / pulsing the dates with the tahini until paste like texture and then put into a bowl
  2. Add the oat flour, chia seeds and coconut to the date paste and mix with your hands until a homogenous mixture that is sticky but holds when you squeeze together. Add a bit more tahini or a splash of plant based milk if too dry.
  3. Shape into balls and then roll in sesame seeds
  4. Enjoy 🙂

Crunchy Peanut Pad Thai Salad

Salad ingredients

  • 1/4 large head of white cabbage (or red – which ever you prefer), finely sliced
  • 2 large carrots, grated

Add the shredded cabbage, grated carrot and sliced coriander into a big mixing bowl and toss together.

Sauce:

  • 2 heaped tablespoons creamy smooth peanut butter (I use the Woolworths organic smooth peanut butter or OhMega peanut butter, make sure no added salt or sugar)
  • 2 tablespoons soy sauce
  • 4 tablespoons apple cider vinegar
  • 1 teaspoon sesame oil (optional)
  • 1 tablespoon maple syrup / local sustainable honey
  • 1 tablespoon water
  • 1 thumb sized piece of fresh ginger
  • handful of chopped fresh coriander (approx 20g)

Topping:

  • Sesame seeds – lightly toasted on a dry pan
  • Pumpkin seeds – lightly toasted

Put all of the sauce ingredients in blender and whizz up until smooth. If you don’t have a blender then whisk together until smooth and add grated or finely chopped ginger (or can use 1 tsp ginger powder instead)

Add the sauce to the salad ingredients and mix it all up with your hands – make sure its all coated.

Top with toasted seeds of choice (I add toasted sesame seeds which you toast on a dry pan for 5 minutes).

TOP TIP:

  • If you want to take this for a big lunch, to make it more filling consider adding some delicious tofu – stir fry for 5 minutes until the edges are crispy then add soy sauce and fry for another minute until caramelised.
  • This sauce is also amazing to add to buckwheat noodle salads – basically just add same ingredients (minus half the cabbage) and some sliced cucumber and you are all set !
  • I also use this sauce as a dipping sauce for Vietnamese summer rolls (see one of my first posts for full recipe)

Vegan Ethiopian Feast

Processed with VSCO with f2 preset

Ethiopian food is without a doubt one of my favourite and easiest cuisines to cook – it is so hearty and warming, and truly only requires about 5 ingredients cooked in different ways. It is very cheap and nutritious, as its core ingredients are whole grains and legumes such as different types of peas and lentils as well as incorporating vegetables such as cabbage, carrot, spinach and beets (all superfoods for the body). The bread used to eat the curries with is called Injera, and it is a fermented sourdough flatbread / pancake which is one of the delicious breads I’ve encountered. It is soft, chewy and wholesome – made from fermented teff flour. I’ve only learnt to cook this particular African cuisine recently and so am still learning, but I think these recipes are definite winners. I did made injera for my own learning benefit in this meal but the recipe still needs to be perfected and there is a lot of learning which goes into this, so will leave for another day (or post!). So – serving with some tasty brown rice will be a treat !

There is one ingredient however which is core to the Ethiopian flavour, and that is a spice blend called Berbere. It is essentially a beautiful blend of aromatics and spicy flavours which give a distinctly African flavour. I mixed my own blend based on a bunch of research and then keep it in a jar for future use as it makes a decent amount of the mix. If you do not have the below spices or want a quick fix, you should be able to find a Berber spice mix at a spice shop. I would definitely recommend mixing your own however as then you can adjust how much chilli and other flavour you want, plus it will actually be cheaper in the long run (not to mention then you will have all the spices which are also used in curries and many other delicious recipes on this blog!)

Berbere spice blend

  • 1 tsp ground black pepper
  • 1 tsp ground cumin (powder or ground from the seed)
  • 1 tsp ground coriander
  • 1/2 teaspoon ground cinnamon 
  • 1 tsp ground turmeric
  • 1-2 tsp cayenne / chili pepper
  • 1 tsp allspice
  • 1/2 tsp ground nutmeg 
  • 3 tablespoon paprika 
  • 1 tablespoon salt 

Simply mix all the spices together in a bowl and then store in a jar (recycled glass jars are my favourite #sustainable way)

Misir Wot (Red Lentil Curry)

  • 1/2 large onion, finely diced
  • 2 cloves garlic, grated
  • 2 tomatoes, blended or finely chopped
  • 2 tablespoons tomato paste (optional but makes it richer in flavour if tomatoes are not super ripe)
  • 1 cup split red lentils
  • 3 cups water
  • 1.5 to 2 tablespoons Berbere spice mix
  • 1 teaspoon salt

Shiro Wot (Chickpea flour hot pot)

  • 1/2 large onion, finely diced
  • 2 cloves garlic, grated
  • 2 tomatoes, blended or finely chopped
  • 2 tablespoons tomato paste (optional but makes it richer in flavour if tomatoes are not super ripe)
  • 1 cup chickpea flour
  • 3 cups water
  • 1.5 to 2 tablespoons Berbere spice mix
  • 1 teaspoon salt

Atkilt Wot (Cruciferous veggies)

  • 2 cloves garlic, grated
  • 3cm piece of fresh ginger, grated
  • 2cm fresh turmeric grated, or 1 teaspoon powdered turmeric
  • 1/2 head of cabbage, sliced into chunks
  • 2 large carrots, finely sliced into circles
  • Juice of 1 lemon

Method:

Misir Wot (Red Lentil Curry)

  • Fry the onion and garlic for 5 minutes until soft and fragrant, and then add in the chopped tomato and paste, as well as the Berbere spice mix. Cook until the tomatoes are no longer raw and most of the moisture is absorbed.
  • Add the red lentils, 3 cups of water and salt. 
  • Let simmer for 20 minutes until the lentils are cooked through and most of the water is absorbed / still saucy. 
  • Serve with rice / injera and enjoy 🙂

Shiro Wot (Chickpea flour hot pot)

  • Fry the onion and garlic for 5 minutes until soft and fragrant, and then add in the chopped tomato and paste, as well as the Berbere spice mix. Cook until the tomatoes are no longer raw and most of the moisture is absorbed.
  • Add 2 cups of the water and let come to a boil
  • In a separate bowl, add the water TO the chickpea and whisk into a smooth paste  (in order to avoid lumps in the main sauce)
  • Once the chickpea batter is smooth, add slowly to the spicy water and keep mixing / whisking until thickened. It will most likely take about 5 – 10 minutes. 
  • Serve with rice / injera and ENJOY 🙂

Atkilt Wot (Cruciferous veggies)

  • In 1-2 tablespoons of oil of choice, fry the garlic, ginger and turmeric for 2 minutes until smelling fragrant (make sure not to burn)
  • Add the cabbage and carrots to the pan / pot and mix through the spices
  • Add a few tablespoons of water to keep the cabbage and spices from burning and to steam the veg in the process. Add up to half a tsp of salt to taste.
  • Keep cooking and turning until the cabbage and carrot are soft, then add a handful of chopped coriander and the lemon juice and serve serve
Processed with VSCO with f2 preset

Vegan Challah Bread

So, for those of you who don’t know what Challah is – you are in for a treat ! This is a soft, delicious tear-apart plaited bread that is eaten every Friday night by Jewish people celebrating the shabbat (sabbath). Traditionally, this bread is made with many eggs, lots of sugar and white flour. If you know anything about me or this blog, however, you will know by now that I made this in to an even healthier and more delicious version of the original recipe. I vegan-ized Challah, shock !

Ingredients:

  • 4 – 4.5 cups of flour – I use 2 cups all purpose white flour & 2 cups wholewheat stoneground flour
  • 1 teaspoon salt
  • 10g packet instant yeast
  • 3 teaspoons brown sugar
  • 330ml warm (tepid) water
  • 1/4 cup sunflower oil
  • sesame seeds
  • 2 tablespoons plant based milk

Utensils:

  • 1 large bowl
  • wooden spoon
  • baking tray
  • pastry basting brush

Method

  1. Start by activating your yeast: in a bowl, mix together the yeast with the sugar and warm water, and let sit for 5 minutes until looks bubbly / active
  2. Meanwhile, add the 4 cups of flour into a bowl with salt
  3. Once the yeast has activated, add it to the flour mixture along with the oil
  4. Mix all together using a wooden spoon until it forms a homogenous dough mixture, then start kneading it with your hands (either in the same bowl, less mess – or if less experienced with kneading, do it on a flat floured surface).
  5. Knead the dough for 5 minutes until it bounces back when you put your finger into the dough. Note: add more flour as necessary if too sticky.
  6. Put the dough into an oiled bowl that is larger than the dough so that it provides support and allows it to rise.
  7. Let rise for 2 hours / until doubled in size (top tip: put the bowl in the oven with just the light ON and this will speed up the rise by providing a warm incubator)
  8. Once risen, knead dough for a few minutes again and then split in 2.
  9. Split each half further into 4 strands and plait into a braid (see any youtube tutorial or do a 3 stranded plait, what ever works for you !)
  10. Place braided breads on an oiled tray, paint the tops of the bread with the milk (or oil) and then sprinkle with sesame seeds generously.
  11. Let this rise again for 30 minutes
  12. Bake at 180 deg celcius for 15 – 20 minutes until the tops are golden and bread is hollow sounding when you tap it.
  13. ENJOYY

Eat Your Greens Soups

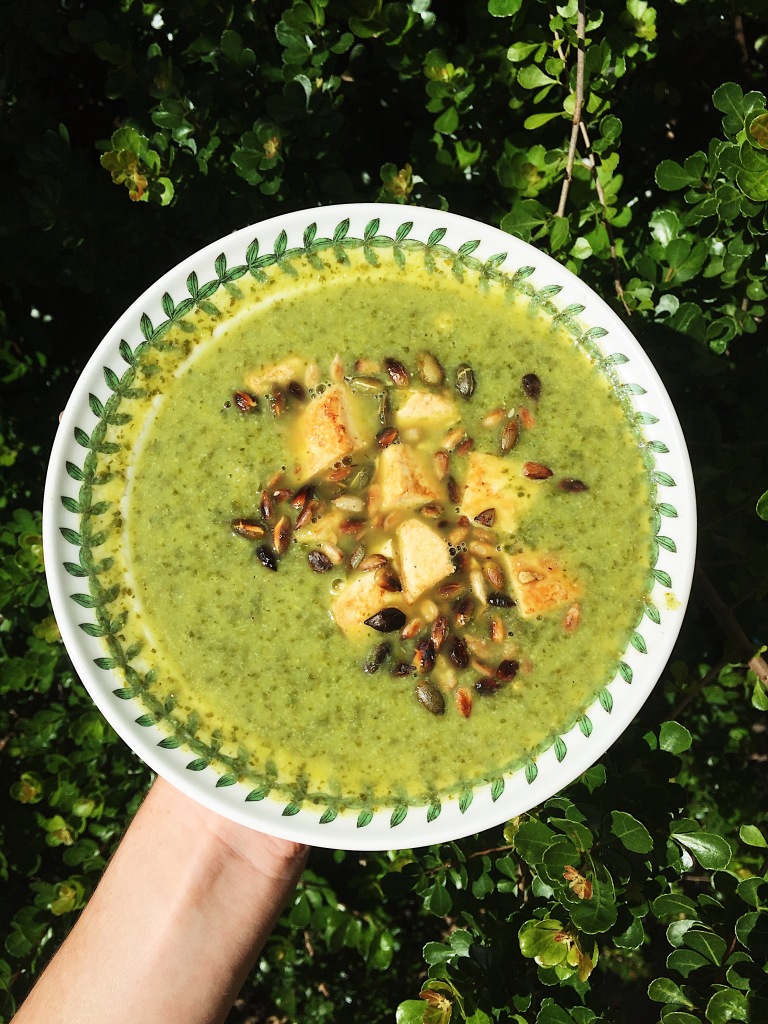
This soup is super (excuse the pun) simple, light and nourishing, filled with 4 different types of greens (exceeding even the 3 advocated by Dr Gregors Daily Dozen). It can be made within 30 minutes for a nutrient packed lunch or dinner, and can easily be bulked up with beans or tofu for a more filling meal.

Broccoli is a powerhouse of nutrients and most importantly contains Sulforaphane, a naturally occurring compound in cruciferous vegetables that has been discovered to have a myriad of health benefits. According to latest research, included on nutritionfacts.org, broccoli can potentially prevent DNA damage and metastatic cancer spread, activate defences against pathogens and pollutants, help to prevent lymphoma, boost your liver detox enzymes, target breast cancer stem cells, and reduce the risk of prostate cancer progression.

So without further iteration, feel free to eat boat loads of this at your will.

Serves: 4

Ingredients:

  • 2 cloves garlic
  • 1 white onion, finely sliced
  • 2 medium sized potatoes, diced
  • 3 sticks of celery (including leaves) sliced into chunks
  • 1 full head of broccoli, including stem
  • 1 bunch of kale or spinach (which ever is in season)
  • 1 bunch / big handful of parsley (curly/flat leaf – we like it all!)
  • 1 teaspoon salt
  • 1/2 teaspoon ground black pepper
  • Vegetable broth (1.5L) or water if you don’t have!
  • Large pot

Optional toppings:

  • Toasted seeds (sunflower, sesame, pumpkin)
  • Tofu – fry until crispy and golden on edges and then add a splash of soy sauce / Tamari for extra flavour

Method:

  1. Start by slicing up all the veggies, then add a splash of oil to pot and sauté garlic, onion and celery until soft and fragrant
  2. Add the rest of the ingredients to the pot and cover with veg stock / water
  3. simmer for 25-30 min until of the ingredients are cooked through
  4. Add parsley at the end for vibrancy of colour
  5. Blend with stick / regular blender (make sure its cool first) until smooth
  6. Top with toasted seeds and tofu for extra protein and enjoy !

Top tips:

  • For an extra creamy texture, you can add a can of butter beans (or half a can of coconut milk) in with the soup to thicken it up before blending
  • For a cheesy taste, add 1-2 tablespoons of nutritional yeast

Spicy Hot Chocolate

Spring is in the air but it’s still a bit cold every now and then, and plus – there’s always an excuse for a warming cup of hot chocolate. This recipe is spicy and super delicious, containing anti-inflammatory ingredients such as cinnamon, ginger tumeric, making it almost an elixir for healing on top of a treat. It can also be made to be cold for a treat and to convert to a smoothie, just add in a frozen banana and you’re good to go (especially as a post work out fuel).

Ingredients:

• 1 heaped tablespoon cacao powder

• 1 teaspoon tumeric powder / 1 thumb size piece of fresh tumeric

• 2cm knob of ginger

• 1/4 tsp ground cinnamon

• 3 pitted dates Or 1 tablespoon maple syrup / sweetener of choice

• 2 cups almond or soy milk or milk of choice (a trick if I’m out of milk is to blend a tablespoon of almond butter with 2 cups water – quick home made milk !)

Method:

  1. Put all of the ingredients in a blender and blend until smooth
  2. Heat up in the stove or microwave and enjoy the tasty treat 🌸

All things orange soup

Let’s talk about fibre.

Fiber is a type of plant based carbohydrate that is not able to be broken down and digested by our body, so it passes all the way to the large intestine where it is broken down and consumed by bacteria living in our colon – the microbiome. Fibre is found in all plant foods such as vegetables, fruit, nuts, seeds, legumes and beans.

Why do we need to eat fibre rich foods?

  1. It helps keep you regular ! Fiber rich foods aid in the procession of food through your intestines by attracting water into the gut, and thus aid in the motility of foods in and out the body.
  2. Stabilises blood sugar levels. It does this by slowing down the rate at which food is emptied out of the stomach and thus regulates and stabilises the availability of broken down natural sugars to the bloodstream.
  3. Lowers cholesterol levels by binding and preventing reuptake into the blood stream, and eliminating cholesterol in the intestines via passage through stool
  4. Feeds our microbiome: enter PREBIOTICS
  5. Reduced risk of colon cancer (!)

What are probiotics and how do eating them help me?

Prebiotics are plant based nutrients, mostly found in fibre rich foods, which are sources of fuel for the bacteria making up the gut, or microbiome. by feeding your microbiome healthy plant sources of fibre and probiotics, it selects for the growth of gut “friendly” bacteria. They also act as food sources for the bacteria, which produce short chain fatty acids (SCFAs) which are fuel sources for the cells of the lining of the large intestine and thus aid in forming a healthy colon.

With all that said, the moral of the story is eat more plants ! This delicious warming recipe is a great example of a meal that will provide lots of fibre and nourish both your soul and your bacteria (ha ha).

Ingredients:

• 1 white onion, diced

• 2 cloves garlic, thinly sliced

• 3 whole sticks of celery (leaves included)

• 6 medium – large orange carrots, sliced in rounds

• 1 medium jewel (orange) sweet potato, diced into 2cm cubes

• 1 large white potato, diced into 2cm cubes

• 1.5 cups split red lentils

• 1.5L water

• 1.5 tsp salt

• 1 tsp tumeric

• 1/2 tsp black pepper

• 1/2 tsp red chili flakes

Method:

  1. Start by adding the chopped garlic, onion, carrots and celery to a pot with 1 tablespoon oil, and fry until soft for 5-10 min, with the lid on after 5 minutes and a pinch of salt.
  2. Once soft and fragrant, add in the rest of the ingredients and let come to a boil
  3. Simmer for 30 mins or so until all the veg is soft and lentils soft
  4. Blend with a stick blender (or a blender that you have that can deal with hot liquids) until smooth – should be quick a thick consistency
  5. Enjoyyyy 🙂